Kubernetes: Dip your toes in this

Min Kim
January 29, 2021

Kubernetes is perhaps one of the most exciting developments in the DevOps world in the last 15 years. It is an open source implementation of the Borg system that was Google’s “secret sauce” – the thing that allowed them to deploy and manage thousands of services in their clusters.
With modern cloud PaaS (platform as a service) like Google Cloud and AWS, most frontend and many backend developers can deploy services without learning about the architecture and technologies that power these platforms. In the past, not knowing about these platforms could be easily forgiven because the learning curve was too steep.
Kubernetes changes all that. It makes understanding these platforms approachable and manageable, allowing frontend developers to learn all about them fairly quickly. The architecture of Kubernetes and the approach that the community is taking towards building Kubernetes continuously lowers the barrier for people who otherwise wouldn’t have an opportunity to learn about Cloud Native Deployment.
At its core, Kubernetes is based on a concept that anyone familiar with React would recognize. It’s a declarative system for service management. Similar to how React allows you to declare what components you want to render with it handling the creation of DOM elements, Kubernetes allows you to declare what services you want to deploy and it takes care of deploying them.
Grasping this comparison can take you surprisingly far into understanding Kubernetes. For example, you can use the same components’ syntax to describe their composition for both web and mobile platforms. React DOM and React Native are adapters that control how your components are rendered in these different environments. Similarly, you can use the same services and same syntax to deploy services to Google Cloud, AWS, Azure or Digital Ocean via different cloud providers.
React takes care of the difficult work of applying declarative state changes to DOM. Kubernetes does the hard work of applying declarative state changes to your infrastructure and services. The important part to remember is that with Kubernetes, you tell it what to do rather than how to do it.
Under the hood, Kubernetes consists of a control panel that manages worker nodes. The control panel’s API is RESTful, but most of the time you’re not going to be interacting with the API directly. Instead you’ll use the CLI, which talks to the RESTful API. The control panel’s specs are agreed on by the Kubernetes community, but the API definition makes it possible for different implementations of Kubernetes to exist.
In this tutorial, we’ll show you how to set up MicroK8S, which is Ubuntu’s implementation of Kubernetes. It’s small enough to run on your machine and will allow you to play around with Kubernetes without having to pay a cloud provider to host it for you.
Installation and Start
Let’s go ahead and install MicroK8S for macOS:
$ brew install ubuntu/microk8s/microk8s
For installation instructions for Windows or Linux, go to the MicroK8S website.
Once it has finished installing, run the following commands:
$ microk8s install
$ microk8s start
microk8s install will start the VM and microk8s start will create a Kubernetes cluster.
Once you start up a cluster, you should be able to run the microk8s status command to display all of the available services. Entering microk8s stop into your terminal will shut off both the VM and the cluster.
Dashboard
Although all of MicroK8S’ functionality can be accessed via your terminal, you can also start up the dashboard service and see everything through the web UI.
Run microk8s dashboard-proxy and you should see the following output:
$ microk8s dashboard-proxyChecking if Dashboard is running.
Waiting for Dashboard to come up.
Dashboard will be available at https://xxx.xxx.xx.x:xxxxx
Use the following token to login:
abcdefgh1234567
Forwarding from 0.0.0.0:xxxx -> xxxx
Go to your browser and enter in the address provided (including the https://) and copy/paste the token to gain access to your dashboard, which will look something like this:
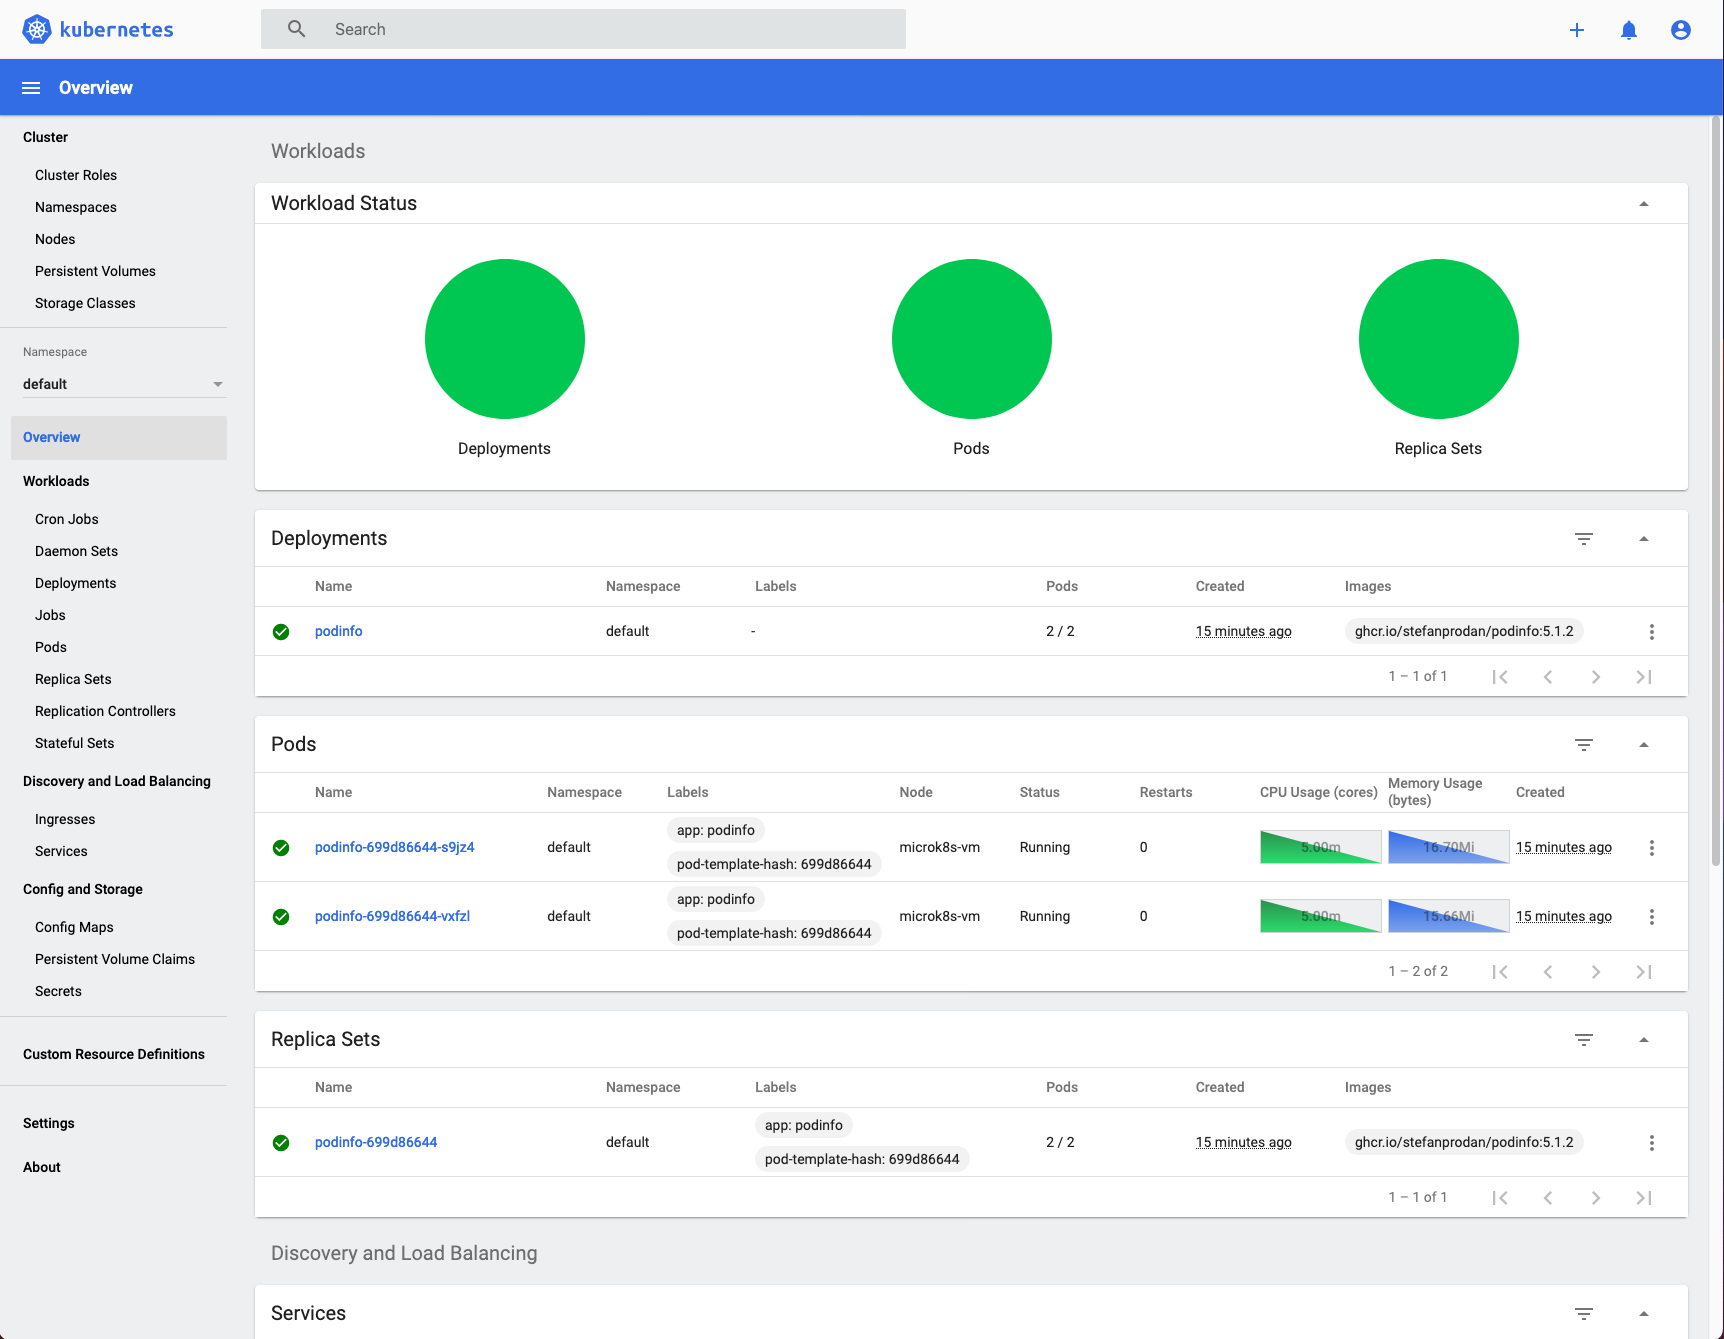
Now when you go back to your terminal, entering the microk8s status command will show that the dashboard has been enabled. If you wish you can run microk8s disable dashboard to disable it again.
Kubectl
Coo-beck-tul? Cube-control? However it’s pronounced, kubectl is a MicroK8S command to help you control Kubernetes clusters; like the ones we started earlier with microk8s start. Let’s use kubectl to deploy a service. For this tutorial we’ll be using a lightweight microservice: https://github.com/stefanprodan/podinfo. The service itself does not do much. It is just to help us practice starting and stopping Kubernetes services.
Use the following command to deploy Podinfo:
$ microk8s kubectl apply -k github.com/stefanprodan/podinfo//kustomize
Now you can run microk8s kubectl get deployments to confirm that podinfo has been deployed.
k9s
We haven’t port-forwarded our deployment so we can’t access it with a browser just yet. There’s a way to port-forward with microk8s but we’ll show you an easier way using k9s.
You’ll need to first install it:
$ brew install k9s
After it finishes installing, you can start it up using the command k9s. Your terminal should look something similar to this:
You can exit out of
k9swith eitherctrl + cor you can press:to initiate a command and enterquit.
In order for k9s to work properly, you’ll need to add your Kubernetes configuration to your local root directory:
$ mkdir ~/.kube && microk8s config > ~/.kube/config
And now when you start up k9s again, you’ll notice the configurations have taken effect.
If you’ve been following along with all of the previous steps, your k9s screen should show the pods that we deployed earlier:
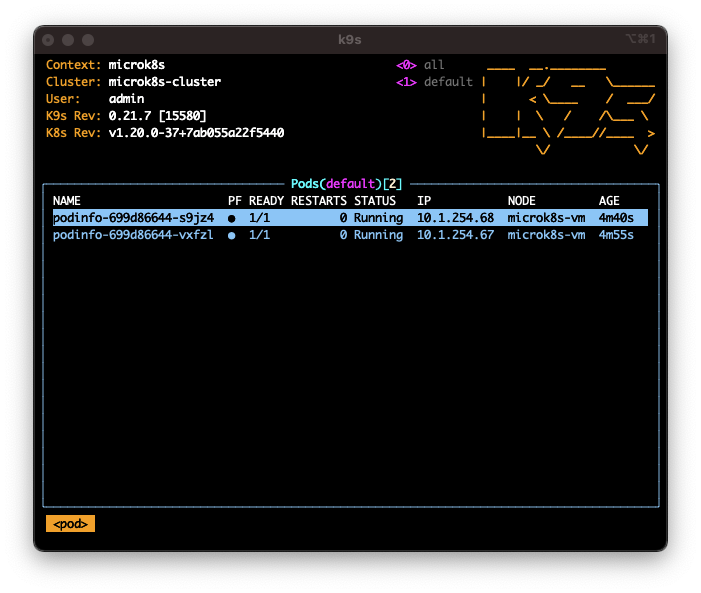
What we’re seeing here are the pods from the service we deployed. We’ll be returning to this page very shortly, but for practice if you want to navigate to the list of deployments, press : and type in deployments.
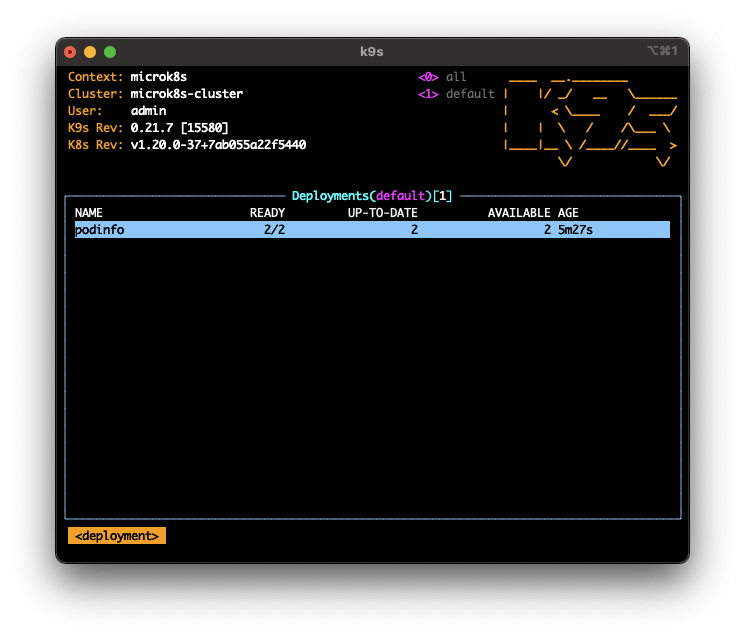
To port-forward this deployment, press enter on podinfo to display its pods again.
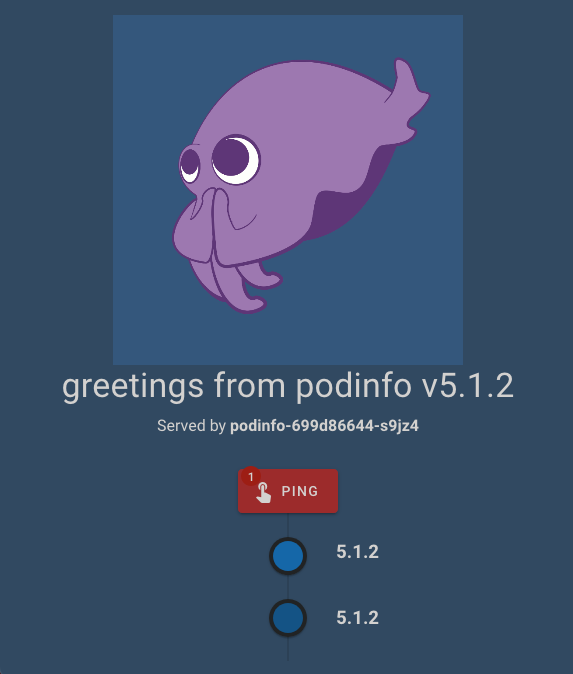
Navigate to any one of the pods and press shift + f to port-forward the service. Then press f to see the hosted URL. Copy and paste this URL to your browser and you should be able to see the service.
Conclusion
Kubernetes is on the rise and having it in your toolkit can get you a long way. Now that you’ve set up a MicroK8S in your machine, you can play around with the basics to start getting familiar with Kubernetes.