Tutorial: Easier onboarding with Backstage and VSCode dev containers

Min Kim
January 24, 2022
An often underrated aspect of developer onboarding is how quickly a new contributor can go from cloning the source code to running the project on their machine. An onboarding experience full of friction can be discouraging and leave a poor impression, while a smooth one is valuable for new and seasoned contributors alike.
However, onboarding can be especially challenging for Backstage because it is a full-stack application. Developing a Backstage-based Developer Portal requires having a recent version of Node.js, Yarn, and PostgreSQL running on the developer's machine. These are relatively easy to install on macOS and Linux but can be challenging on Windows, especially for someone new to the Node.js ecosystem.
At Frontside, we've had success improving onboarding by using dev containers, which spins up a docker-based local environment with all the dependencies that a project needs.
Dev containers has a CLI called devcontainer-cli you can use to open the container from the command line. It will open in VSCode, which uses Remote Containers Extension to create a smooth integration.
For the most part, running dev containers inside VSCode feels like the application is running on your machine. Once you've added dev containers to your project, there’s a clear pathway to adopting GitHub Codespaces, which makes onboarding even easier.
This blog post will explain setting up dev containers for Backstage projects as a first step to create a streamlined onboarding for developers.
Requirements
Before you get started, make sure you have the following:
- Visual Studio Code
- Remote Containers Extension for VSCode
- Docker Desktop
- Docker Compose (if you're running Linux)
Create a Backstage App
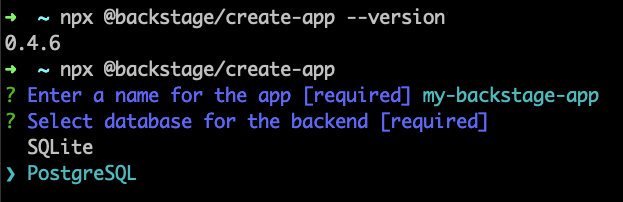
To spin up a dev container, you first need a project to work from. You can instantiate a Backstage app using @backstage/create-app:
npx @backstage/create-app
For this tutorial, you'll be using PostgreSQL:
Once the app is done installing, open the new app's workspace in visual studio code and set up a dev container.
Opening a Project inside a dev container
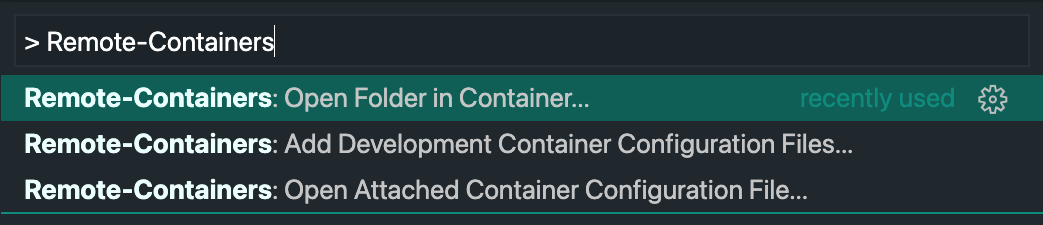
If you have the Remote Containers extension installed, you should be able to access its commands. Press F1 and select Remote-Containers: Open Folder in Container...:
VSCode will detect that you do not have dev container configurations yet and prompt you to select a predefined container. You can go ahead and select any of them, as you'll be replacing all of those configurations later.
Once you make your selection, VSCode will create configuration files in the .devcontainer directory, build the container according to those files, and launch your workspace in the container. (You can go to your Docker Desktop dashboard to confirm that the new container is running.)
If you change your dev container configuration, you can run Remote-Containers: Rebuild Container. And when you are ready to exit out of your dev container, run Remote-Containers: Reopen Folder Locally.
Now that you know how to launch and exit out of dev containers, you need to add configurations to run Backstage.
Docker Compose - Postgres
If you try to start up Backstage now, you'll get an error in the terminal about there being no database to connect to. This is because you're not running an instance of Postgres yet, so you should start there. At the root of your project workspace create a docker-compose.yaml file:
version: "3.8"

services:
  my_postgres_db:
    image: postgres
    environment:
      POSTGRES_USER: postgres_username
      POSTGRES_PASSWORD: postgres_password
You're creating a my_postgres_db service with the official postgres docker image and providing it a username and password to bootstrap a Postgres account for local development.
Docker Compose - dev container
Next, create a service for your dev container (this will replace the one that VSCode automatically generated earlier).
services:
  my_postgres_db:
    ...
  my_devcontainer:
    image: mcr.microsoft.com/vscode/devcontainers/typescript-node:14
    command: /bin/sh -c "while sleep 1000; do:; done"
    volumes:
      - .:/workspace
    environment:
      POSTGRES_HOST: my_postgres_db
      POSTGRES_USER: postgres_username
      POSTGRES_PASSWORD: postgres_password
For your dev container image, you’re using one of the docker images created by Microsoft and running a shell command to prevent the container from exiting on its own as suggested in the devcontainer docs.
For a container to have all of the files of the backstage app, you need to add volumes: .:/workspace as shown in the previous snippet. This will take the current directory (relative to the docker-compose file) and copy its contents to your container's /workspace directory.
You're also passing in environment variables to access the local instance of Postgres. These should correspond to the values you specified when creating the my_postgres_db service. (Alternatively, you could provide these values as environment variables and pass them through the start script of your backstage backend.)
Rebuild devcontainer
Now you need to update your dev container configurations to use the docker-compose file you created:
// .devcontainers/devcontainer.json
{
  "dockerComposeFile": "../docker-compose.yaml",
  "service": "my_devcontainer",
  "workspaceFolder": "/workspace"
}
For these changes to be applied, you will need to rebuild your dev container by running either Remote-Containers: Rebuild Container or Rebuild and Reopen in Container, depending on if you returned to your local environment or if you're still in the first dev container you launched. You can go ahead and delete the other files that were created inside .devcontainer/.
Using Persistent Volumes
At this point, if you try to add a dependency or run yarn install, you may notice that it takes much longer than it usually does in your local environment. This is because when you create files in a docker container, it writes to the container's writable layer, which is not very fast. The standard practice (as suggested by docker docs) is to use volumes.
In your docker-compose file, add the three node_modules directories of your backstage app:
services:
  my_postgres_db:
    ...
  my_devcontainer:
    ...
    volumes:
      - .:/workspace
      - /workspace/node_modules
      - /workspace/packages/app/node_modules
      - /workspace/packages/backend/node_modules
This syntax can be a little confusing at first, and you may be wondering if and why .:/workspace omits node_modules. Although they are nested under the same volumes property, what they achieve is different. When you specify both a source and target path, docker-compose will treat that as a bind mount. But when you pass in only a target path, docker-compose will create an anonymous volume.
What's happening here is docker-compose first copies your backstage app to the /workspace directory of your dev container and then maps out the contents of node_modules to persistent volumes. You can read more about the differences between a bind mount and a volume here.
Once you complete these steps and rebuild and reopen your dev container, you should see a significant improvement when you run yarn install.
Dev containers are a first step
Now that you know how to set up dev containers optimized for Backstage development, you can make it easier for your teammates to contribute to your Developer Portal (regardless of whether they use macOS, Linux or Windows) by including the settings explained in this tutorial in your repository.
The setup we explained in this tutorial also allows people to opt-in (or not) to running dev containers, so these changes do not affect anybody with other local development preferences.
Dev containers are meant to lower barriers for those who cannot run the project locally. However, it's important to point out that even though dev containers are a convenient way to run the project, the DX of developing in a dev container is still inferior in some ways to running the project locally because it introduces the overhead of running Docker containers. With that said, we still believe that they are a handy tool and will drive the DX of your project in the right direction.