Backstage tutorial: plugin integration tests with Cypress + Interactors

Jorge Lainfiesta
March 3, 2022

Plugins are the most common way to extend the power of Backstage. A plugin most often includes a UI built using @backstage/core-components and other Material UI components.
While Material UI makes it quick and easy to put together a good-looking UI, it also poses challenges when testing.
Consider this button:
<Button variant="contained" size="large" color="primary">
  =
</Button>
It generates the following output:
<button class="MuiButtonBase-root-201 MuiButton-root-216 MuiButton-contained-224 MuiButton-containedPrimary-225 MuiButton-containedSizeLarge-234 MuiButton-sizeLarge-236" tabindex="0" type="button" aria-label="=">
  <span class="MuiButton-label-217">=</span>
  <span class="MuiTouchRipple-root-304"></span>
</button>
That's a lot of generated classes. How will you know which selectors to use for your test actions and assertions? Usually you'd have to guess and try to craft selectors for each MUI component you use every time you use one.
Happily you don't have to worry about this anymore! The Frontside team has gone through the MUI components and created "Interactors" like the following that you can use in your tests:
import { Button } from '@interactors/material-ui';
//...
Button('=').exists()g
This tutorial will show you how to set up integration tests for your Backstage plugin using Cypress and Interactors. In it you’ll learn how to:
- Set up Cypress and Interactors
- Assert with Interactors
- Act with Interactors
- Extend existing Interactors
- Write your own Interactor
- Use other Material UI Interactors
What you'll be testing
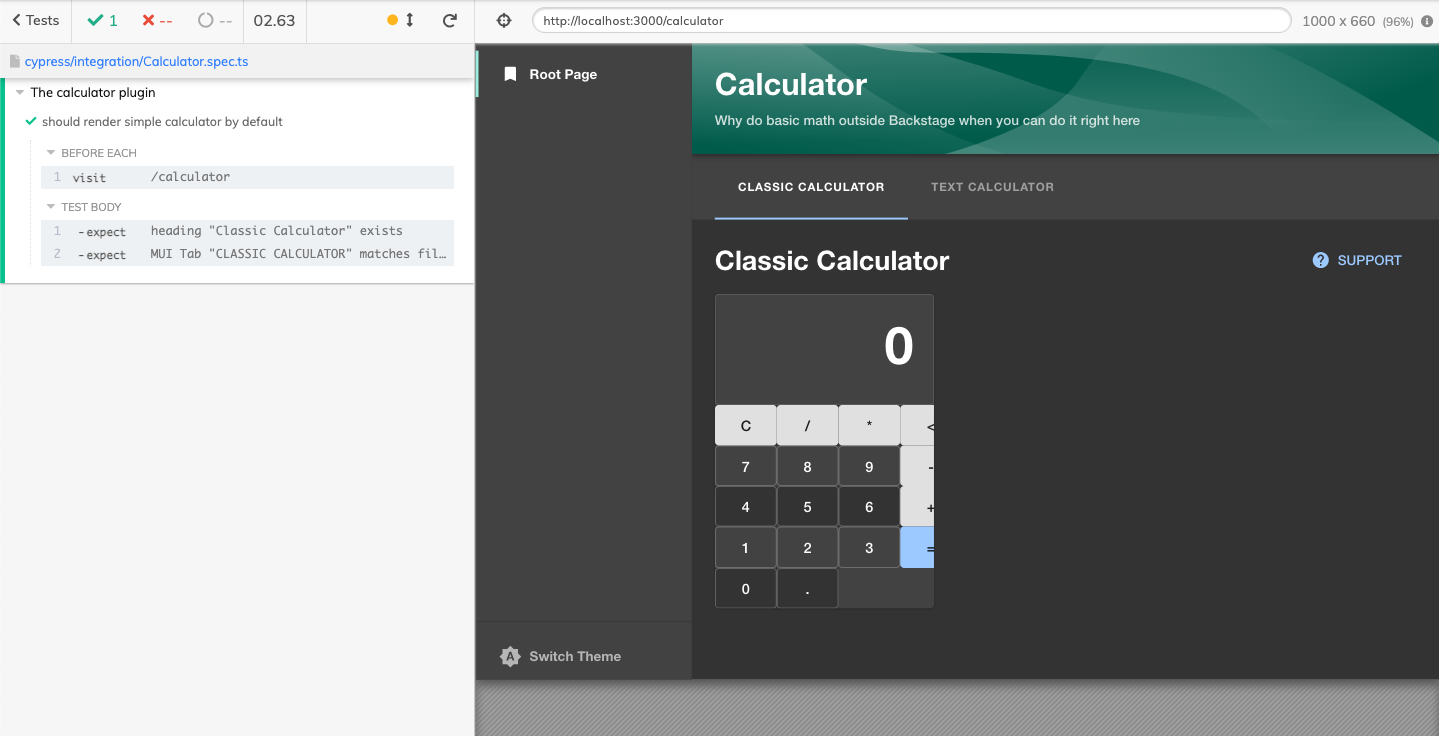
I created a Backstage plugin calculator with Material UI to use as an example for this tutorial. It features a 'classic calculator' with a button-based UI and a 'text-based calculator' which relies on a text field for input:
The calculator doesn't do anything exciting, so we won't go over the implementation details. You can have a look at the whole code in this repository.
Set up Cypress and Interactors
By default, Backstage sets up new plugins with Jest. Jest can help you with unit tests, but integration tests have significant performance problems due to the DOM virtualization.
Thus, I recommend using Cypress for your plugin's integration tests, which Backstage uses as well to test the instance as a whole.
I won't cover Cypress in much detail because you probably already have it set up for Backstage. All you need to do is apply those configurations and practices to your plugins too.
There's actually only two Interactors-specific settings to consider. First, make sure you're importing @interactors/with-cypress in your plugin's cypress/support/index.ts file. Secondly, adjust your eslint settings to accommodate Interactor's assertions in your plugin's cypress directory:
{
  "plugins": ["cypress"],
  "extends": ["plugin:cypress/recommended"],
  "rules": {
    "jest/expect-expect": [
      "error",
      {
        "assertFunctionNames": ["cy.expect"]
      }
    ],
    "new-cap": "off"
  }
}
Next, add the Material UI Interactors to your plugin. You know the drill:
yarn add --dev @interactors/material-ui
You can use Interactors with Jest in this step if you want, but because we'll be using them with Cypress, we need to install specific bindings:
yarn add --dev @interactors/with-cypress
Assert with Interactors
I'll use the Calculator plugin I created as an example for this tutorial. You can clone my repo and work from testless-calculator branch if you want to follow along.
The first test we'll write is to assert that the plugin's entry page renders when someone visits the plugin's URL:
import { Heading, Tab } from '@interactors/material-ui';

describe('The calculator plugin', () => {
  beforeEach(() => cy.visit('/calculator'));

  it('should render simple calculator by default', () => {
    cy.expect([
      Heading('Classic Calculator').exists(),
      Tab('CLASSIC CALCULATOR').is({ active: true }),
    ]);
  });
});
cy.expect is one of Interactors bindings for Cypress and it's used for assertions (the ther binding is explained next section). In the test above, you're telling Cypress to check if a MUI Heading with the text "Classic Calculator" exists and if a MUI Tab with the label "CLASSIC CALCULATOR" is active.
Act with Interactors
Interactors enforce an AAA (Arrange-Act-Assert) pattern to provide helpful errors. So far, you've seen the function used for assertions (cy.expect). Now let's take a look at actions, well, in action with cy.do.
The second test you'll write will confirm that the inner navigation of the plugin works correctly. To do that, you'll have Cypress click on a tab that takes the user to another page and verify if the UI reflects that state:
  it('should change to input calculator with tab', () => {
    cy.do([
      Tab('TEXT CALCULATOR').click(),
    ]);
    cy.expect([
      Heading('Text-based Calculator').exists(),
      Tab('TEXT CALCULATOR').is({ active: true }),
    ]);
  });
cy.do is the other Interactors binding for Cypress, and it lets you perform actions. As you can see, you use the same Interactors to act and assert.
Extend existing Interactors
The classic calculator from the example also has some interactions that need to be tested. A recurring element that we'll need to check is the calculator's results box, so let's write an Interactor to target it:
import { HTML } from '@interactors/material-ui';

const CalculatorResult = HTML.extend<HTMLParagraphElement>(
  'Calculator result',
).selector('.calculator-results');
In the code above you're creating a new Interactor called "Calculator result", which extends the base HTML Interactor and specifies its selector as .calculator-result. (You can organize your Interactors in dedicated directories and files, but for simplicity I added this interactor on top of the spec file.)
Let's use the new CalculatorResult Interactor to check that clicking on the digit buttons results in their corresponding value appearing in the results panel:
it('should show inputted numbers in the result box', () => {
  cy.do([
    Button('0').click(),
    Button('1').click(),
    Button('2').click(),
    Button('3').click()
  ]);
  cy.expect([
    CalculatorResult().has({ text: '123' })
  ]);
})
You're checking that the calculator result corresponds to the digits pressed. It's worth noticing that the CalculatorResult() needs to match a single element or it'll throw an exception.
In this example, there's no way two results will be present on the same page, so if that did happen you'd certainly want your test to fail. You can specify filters and matchers to fine-tune your Interactor selection so it only picks up one element.
Write your own Interactor
The classic calculator has several cases to be tested. Does addition and substraction work correctly? What about the sequence of operations? If I wanted to test an operation like 101+23-7, I'd need to write a test like the following:
it('should add two numbers correctly', () => {
  cy.do([
    Button('1').click(),
    Button('0').click(),
    Button('1').click(),
    Button('+').click(),
    Button('2').click(),
    Button('3').click(),
    Button('-').click(),
    Button('7').click(),
    Button('=').click(),
  ]);
  cy.expect([
    CalculatorResult().has({ text: '117' })
  ]);
});
As you can imagine, testing more complex operations can be burdensome with all the manual button clicking. Instead, you can write an interactor for the classic calculator that performs the button clicking for you:
const ClassicCalculator = createInteractor('Calculator')
  .selector('.classic-calculator')
  .actions({
    async inputDigits(calculator, digits: string) {
      for (const digit of digits) {
        await calculator.find(Button(digit)).click()
      }
    }
  });
In the code above, you're defining an Interactor called "Calculator" and specifying an action for it. The inputDigits action will receive this calculator interactor instance as the first argument with a digits parameter. For every digit, you're finding a Button interactor with the specified digit within the calculator Interactor and clicking it.
Using your ClassicCalculator Interactor, you can write the previous test example as:
it('should add two numbers correctly with Interactor', () => {
  cy.do([
    ClassicCalculator().inputDigits('101+23-7=')
  ]);
  cy.expect([
    CalculatorResult().has({ text: '117' })
  ]);
});
Other Material UI Interactors
@interactors/material-ui comes packed with 30+ Interactors for Material UI components. You can choose whichever interactor suits your UI from the detailed MUI Interactors API.
To illustrate how useful these are, let’s use another Interactor with a test for the other tab of my calculator plugin. Instead of a button-based input, the "Text-based calculator" accepts a math expression from the user and prints the result to the result box. Thus, I can use the Material UI TextField Interactor as follows:
import { Button, TextField } from '@interactors/material-ui';

describe('The text calculator', () => {
  beforeEach(() => cy.visit('/calculator/text'));

  it('should render initail state', () => {
    cy.expect([
      TextField('Math expression').exists(),
      Button('=').exists(),
      CalculatorResult().has({ text: '0' })
    ])
  });

  it('should solve an expression', () => {
    cy.do([
      TextField('Math expression').fillIn('101+23'),
      Button('=').click(),
    ]);
    cy.expect([
      CalculatorResult().has({ text: '124' })
    ]);
  });
});
If you run the test suite based on Cypress and Interactors, it should look like this:
Conclusion
Using Interactors in your Backstage integration tests can help you save time and development efforts. Try them out, and if you need any help, reach out via our Discord server and ask away!